You do not need a competition to put your work on UNI. Any architecture or design project can be published straight to your portfolio, which is your profile page, and entered into a competition later if you want. Uploading a project takes six steps: name it, add a cover, add your media, pick disciplines, pick a license, then publish. Everything else is optional.
Only published projects are visible to anyone else, and only a published project can be attached to a competition entry. A draft stays private to you and to anyone you add to the team.
Photos straight off an iPhone need converting first. The file pickers accept JPEG, PNG and the other web formats, and HEIC is not among them, so an iPhone photo will not be selectable even though UNI converts HEIC to JPEG once it arrives. Export or share the photo as JPEG before you upload it. On iOS you can also set Camera to Most Compatible so new photos are saved as JPEG.
Start a new project
- Go to your profile and open the Projects tab.
- Click Create Project.
- Type a name for the project and click Continue Building.
From this point the project is saved as a draft and keeps saving as you work. The status chip in the top bar shows whether your latest change is saved. You can find drafts again under the Drafts filter on your profile Projects tab.
You can rename the project at any time, before or after publishing.
Add the cover, title and description
The cover image is also the thumbnail on your project card, so upload a landscape image in a 2:1 ratio.
- Title: up to 100 characters.
- Description: up to 360 characters. Treat it as an elevator pitch.
- The cover has its own slot above the gallery. If you would rather promote an image already in the gallery, use the convert-to-cover action on that image.
Add your media
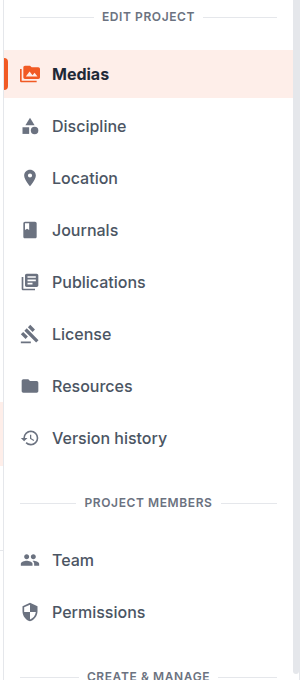
Use Add Image, Add Video or Embed Content above the gallery, or drag files straight onto it.
Images:
- JPG, PNG, GIF, WebP, BMP and TIFF are accepted. SVG is refused, because an SVG can carry scripts.
- Each file can be up to 20 MB.
- Anything wider or taller than 4000 pixels, or above 16 megapixels, is resized during upload. Nothing is rejected for pixel count, so you do not need to shrink images before uploading.
Video:
- MP4 only, up to 2 GB and up to 30 minutes.
Embeds:
- YouTube, Vimeo, Beegraphy, Figma, CodePen and Instagram are recognised. For anything else, paste the iframe code or the URL.
- If the video is your own work, uploading it as MP4 is better than embedding it. It keeps playing even if the copy on YouTube or Vimeo is taken down.
Every item in the gallery has its own controls: edit it to add a title and description, drag it or use the arrows to reorder, and delete it to remove it.
Choose disciplines
Open Discipline and select at least one, up to four. Disciplines decide where your project surfaces in search and category listings, so pick the ones that actually describe the work.
Set a location
Location is optional. Open Location, search for the place, then drag the marker to the exact spot. Tabs at the top let you place a project on Mars, the Moon or in orbit instead, by entering a name and coordinates.
Connect journals and publications
Both are optional, and both need the journal or publication to be published already.
- Journals carry the story behind the work: process, experiments, site notes. Open Journals and click Add journal. You can connect more than one.
- Publications are the right place for technical drawings, reports and brochures, because a publication keeps full detail instead of being resized like a gallery image. Open Publications and click Add publication.
Choose a license
Open License and pick one. You can choose one of six Creative Commons licenses or keep everything with Copyright reserved.
Publish
Publish stays disabled until the project has all six of these:
- A title
- A description
- A cover image
- At least one discipline
- A license
- At least one media item
Once they are all in place, click Publish in the top bar. If the button is still greyed out, click it anyway and it will list what is missing.
Editing after you publish
Publishing is not final. When you edit a published project the changes are held as a draft and your live page keeps showing the last published version, so click Publish again to push them out.
Every publish is saved under Version history, and you can restore an earlier version into your draft from there.
Add your team
Collaborators and organizations are added from Team. See How to invite team members to your project on uni.
Your project content and your team list are public once you publish, on uni and to search engines, so check both before you publish.